How to Use GitLens to Compare Commits in VSCode
Learn how to efficiently compare commits in VSCode using GitLens—a must-know skill for debugging and version control.
Background
Recently, I encountered an issue with my Ruby on Rails application: a test was failing due to an obscure error. To identify the problematic file, I decided to compare the commit where the application worked (commit_1) with the one where it broke (commit_2). While git diff <commit_1> <commit_2> can show differences, its terminal output is hard to read. Instead, I used GitLens in VSCode for a more visual and user-friendly comparison.
Setup
To follow this tutorial, you’ll need Visual Studio Code (VSCode) with the GitLens extension installed. Alternatively, you can compare files in the terminal using git diff <commit_1> <commit_2> for detailed changes or git diff --name-only <commit_1> <commit_2> for just file names. The <commit_1> and <commit_2> placeholders represent SHA hashes, which you can find by running git log --oneline in the terminal or checking the commit history on GitHub.
I will share one of my public repositories here for example sake, but feel free to use your own.
Clone my public Battleship repository to try this yourself:
1
2
git clone git@github.com:MclPio/battleship.git
cd battleship
I’ll use these commits for the tutorial:
commit_1: b9af749a4db04016aee8149b1b21fa84b0742bf5 (or b9af749)
commit_2: 74a187b753323c33d57e83ff471cd04277db70f6 (or 74a187b)
Process
Identify the Commits
To pinpoint the issue, use git checkout <commit> to test a commit and verify if your application works (e.g., git checkout b9af749a4db04016aee8149b1b21fa84b0742bf5). Repeat this for other commits until you find the one where the issue appears. Note the working commit (commit_1) and the broken commit (commit_2) for comparison.
Compare in the Terminal
You can use git diff to compare commits in the terminal. For a list of changed files, run:
1
git diff --name-only b9af749a4db04016aee8149b1b21fa84b0742bf5 74a187b753323c33d57e83ff471cd04277db70f6
This outputs files that changed between commit_1 and commit_2:
1
2
3
4
README.md
babel.config.js
...
webpack.config.js
To see line-by-line differences, omit the --name-only flag. This list helps identify files potentially causing the issue.
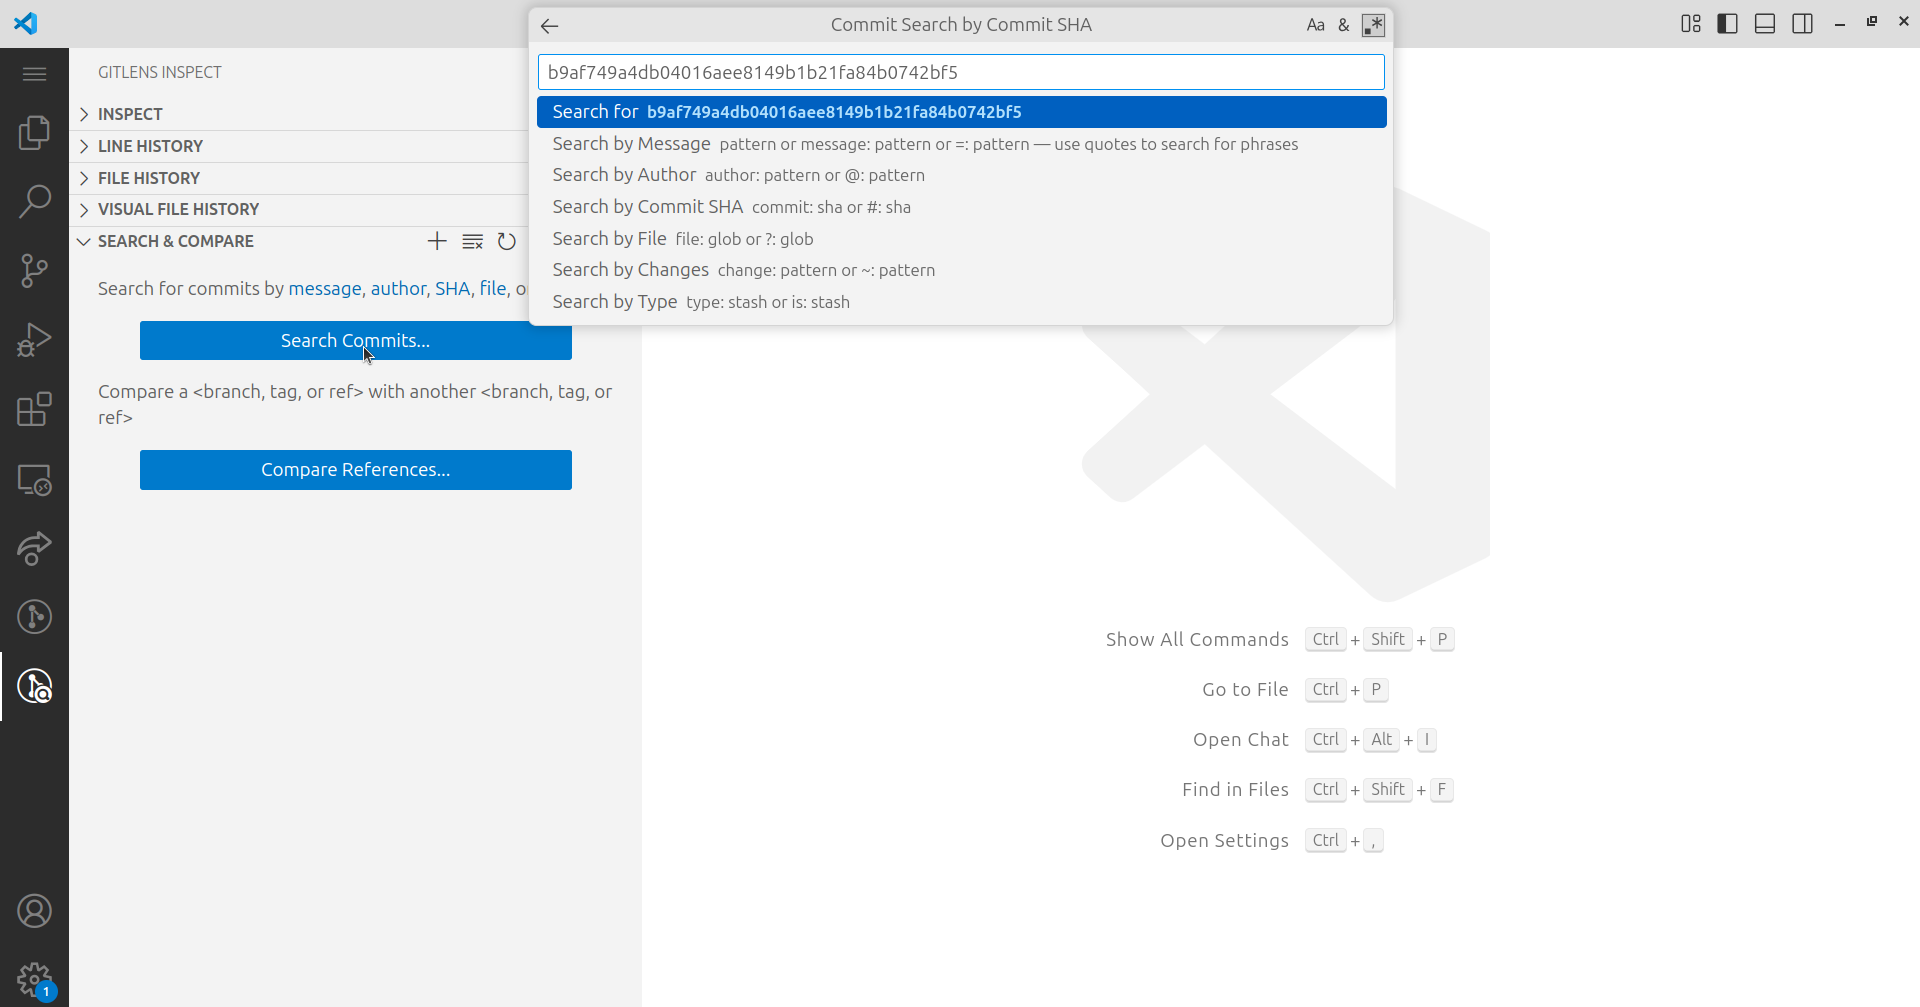
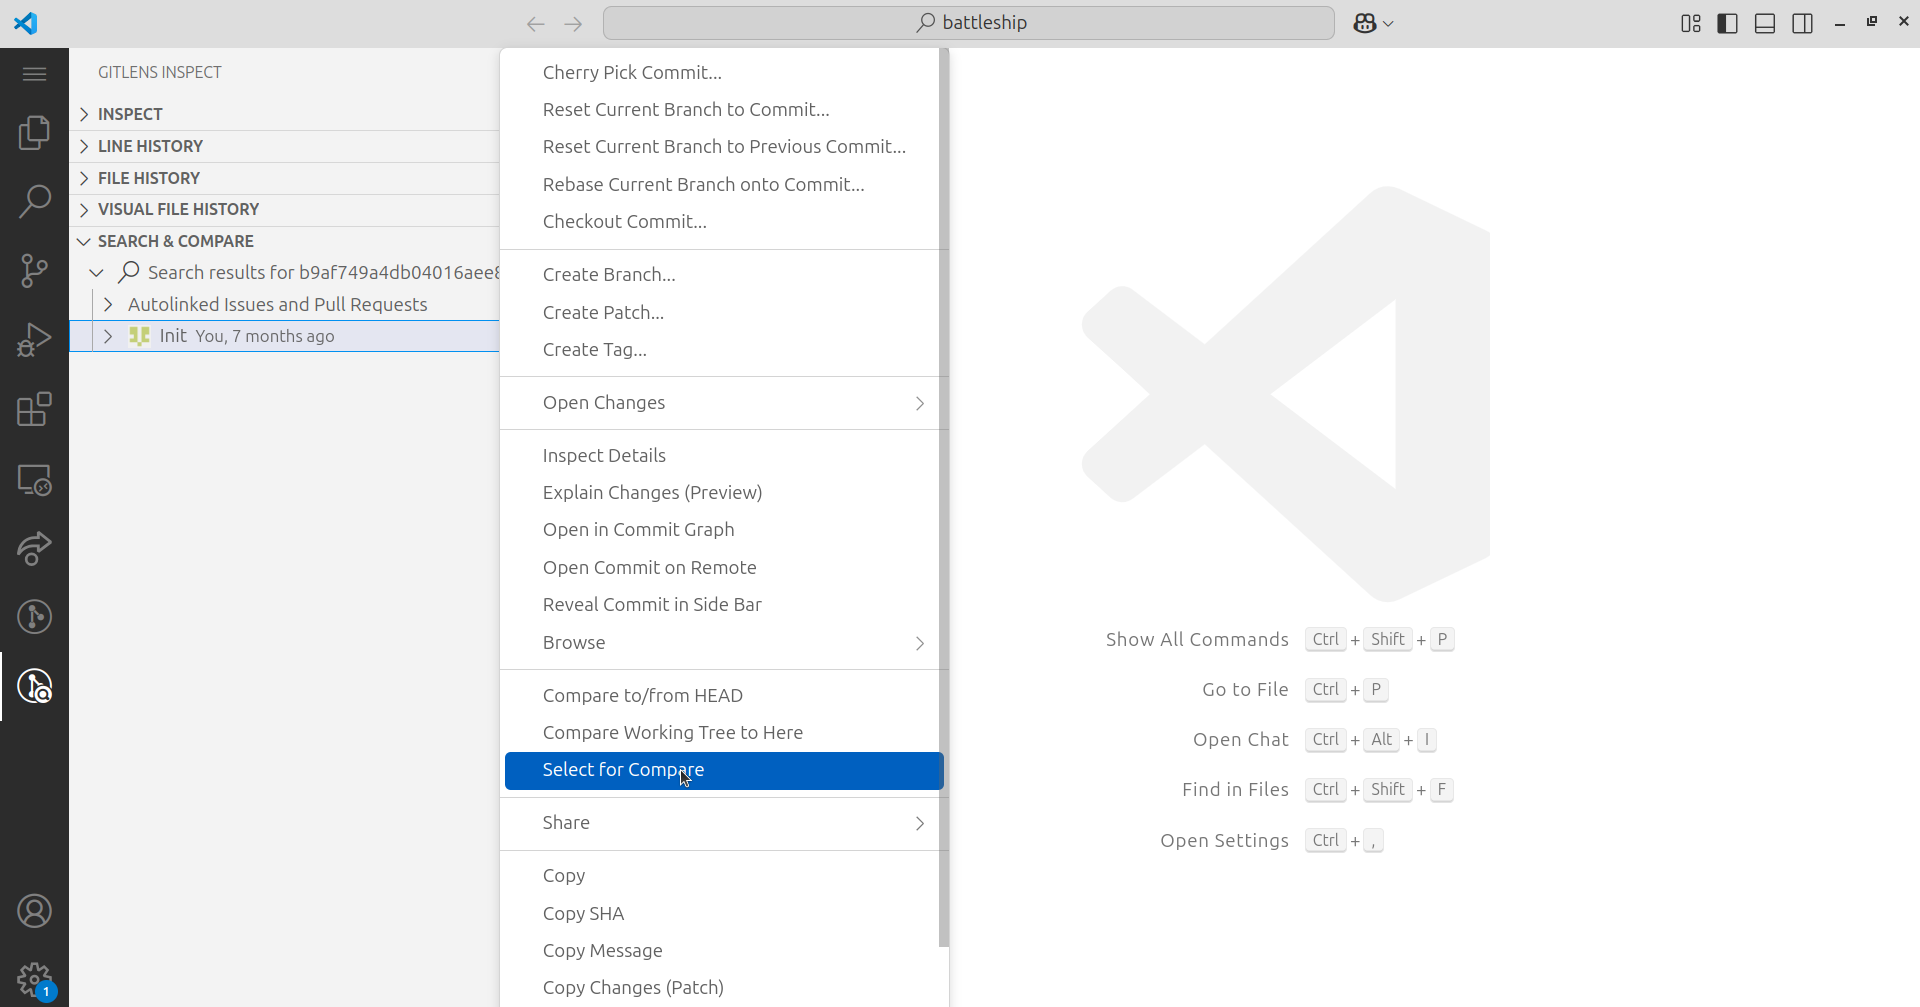
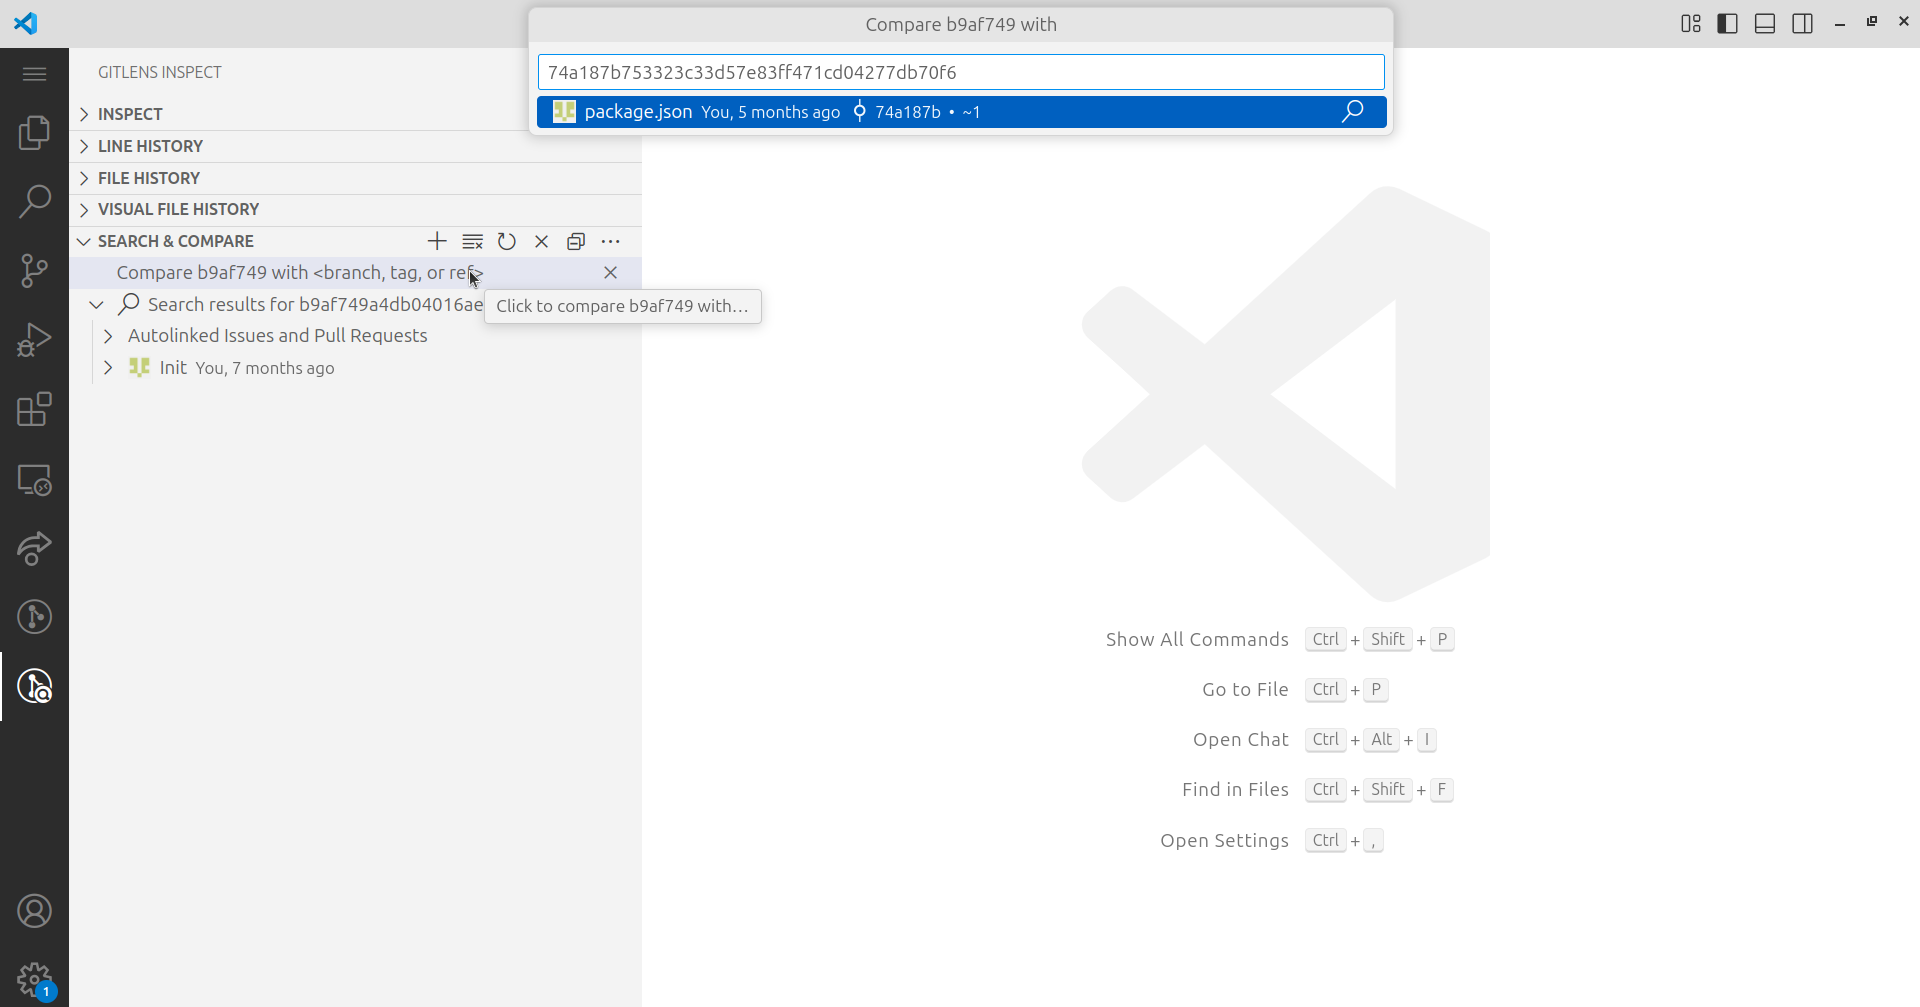
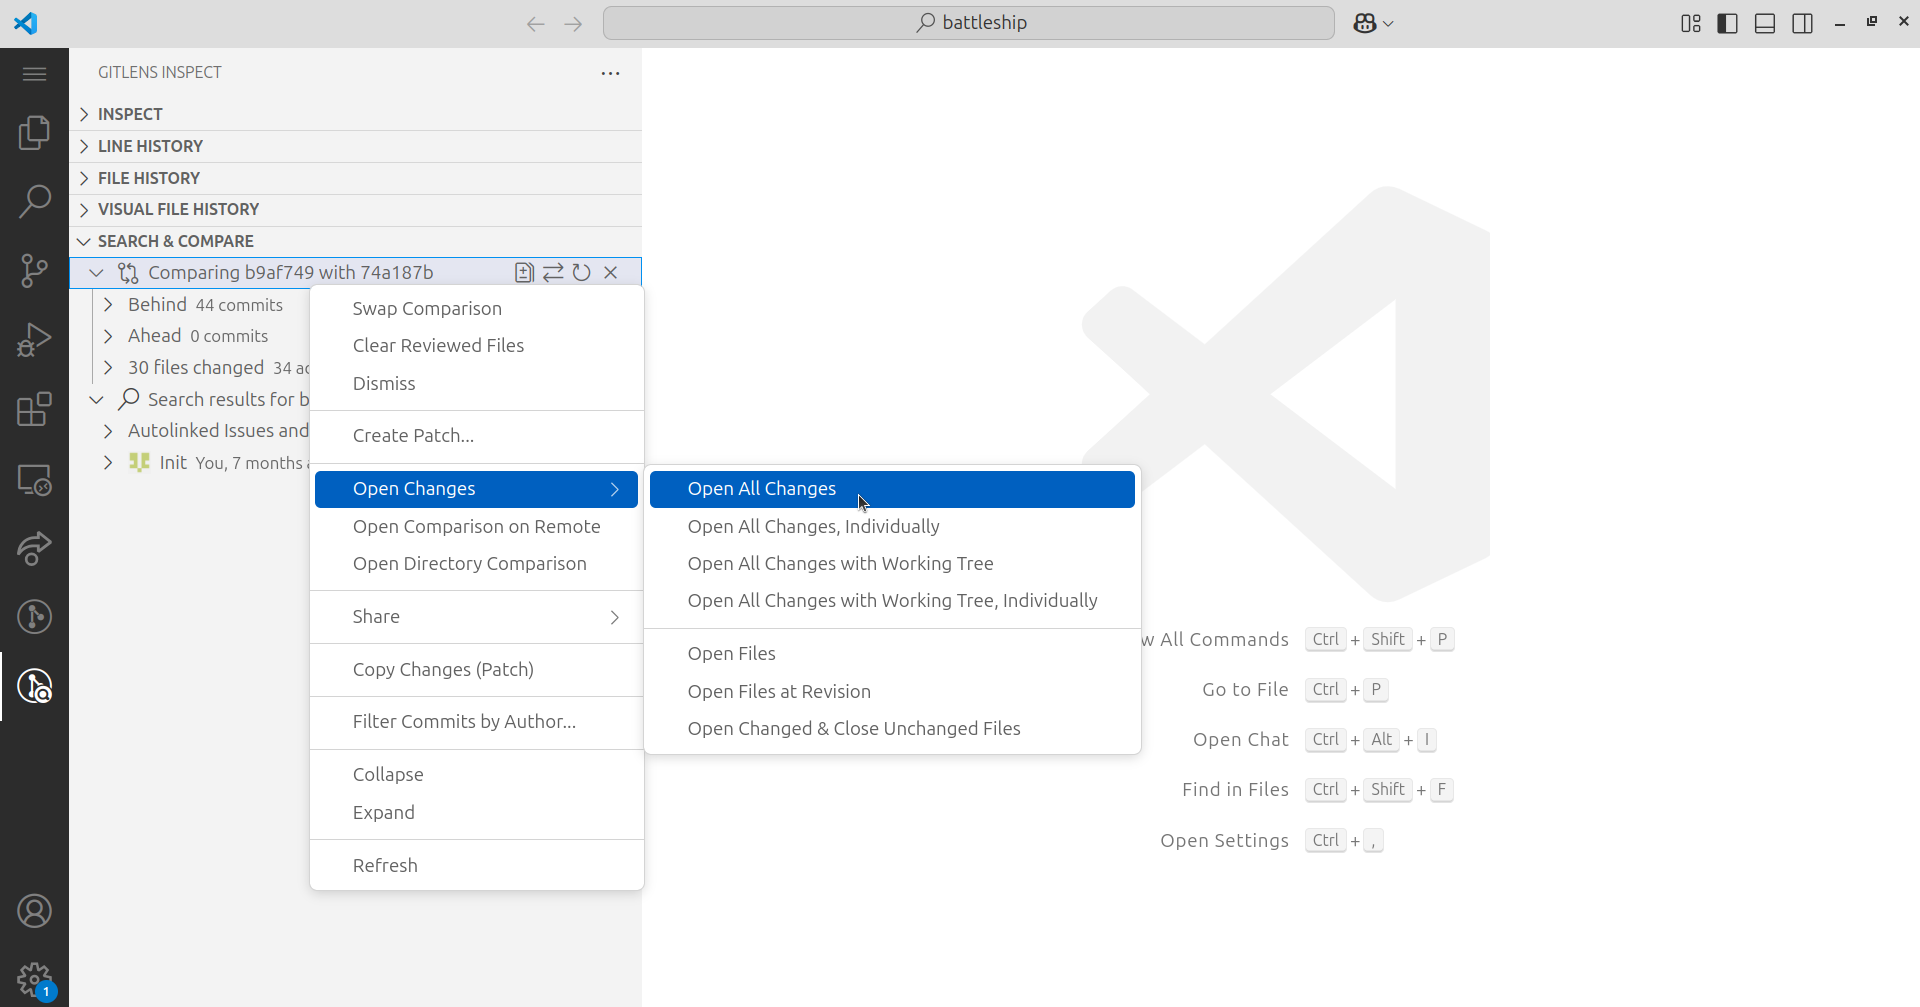
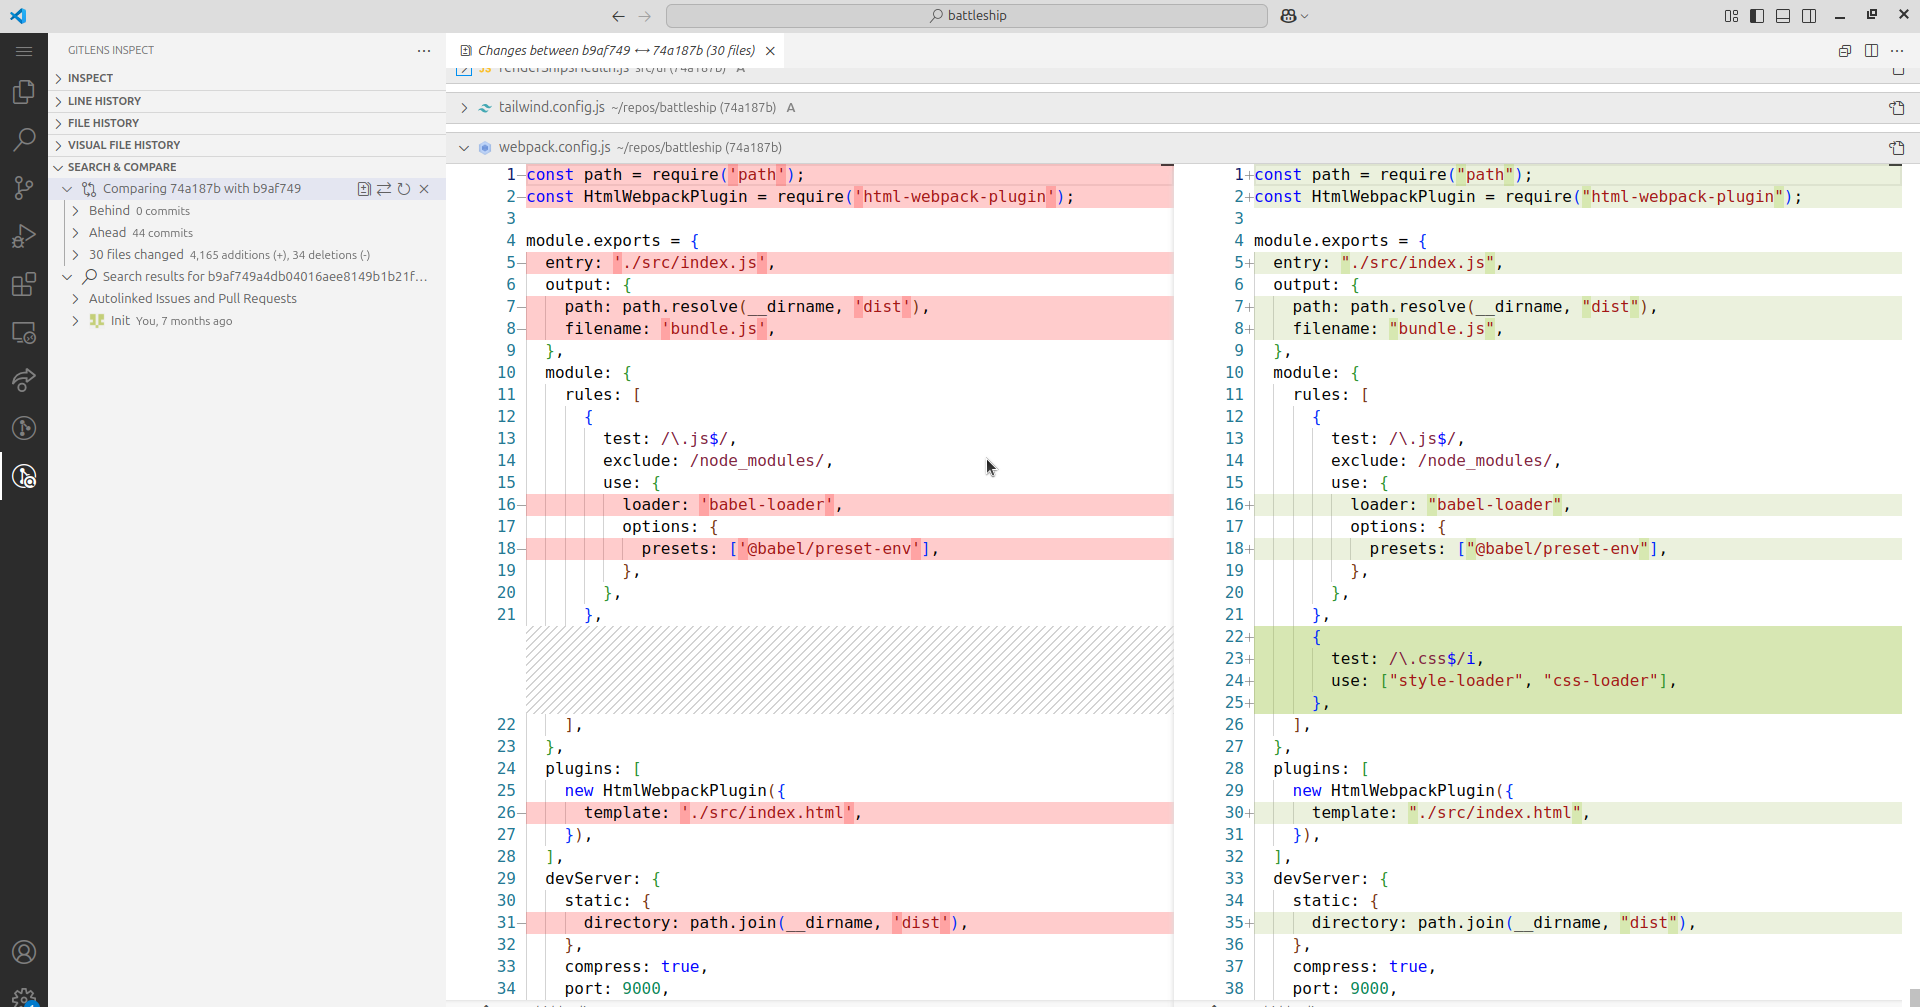
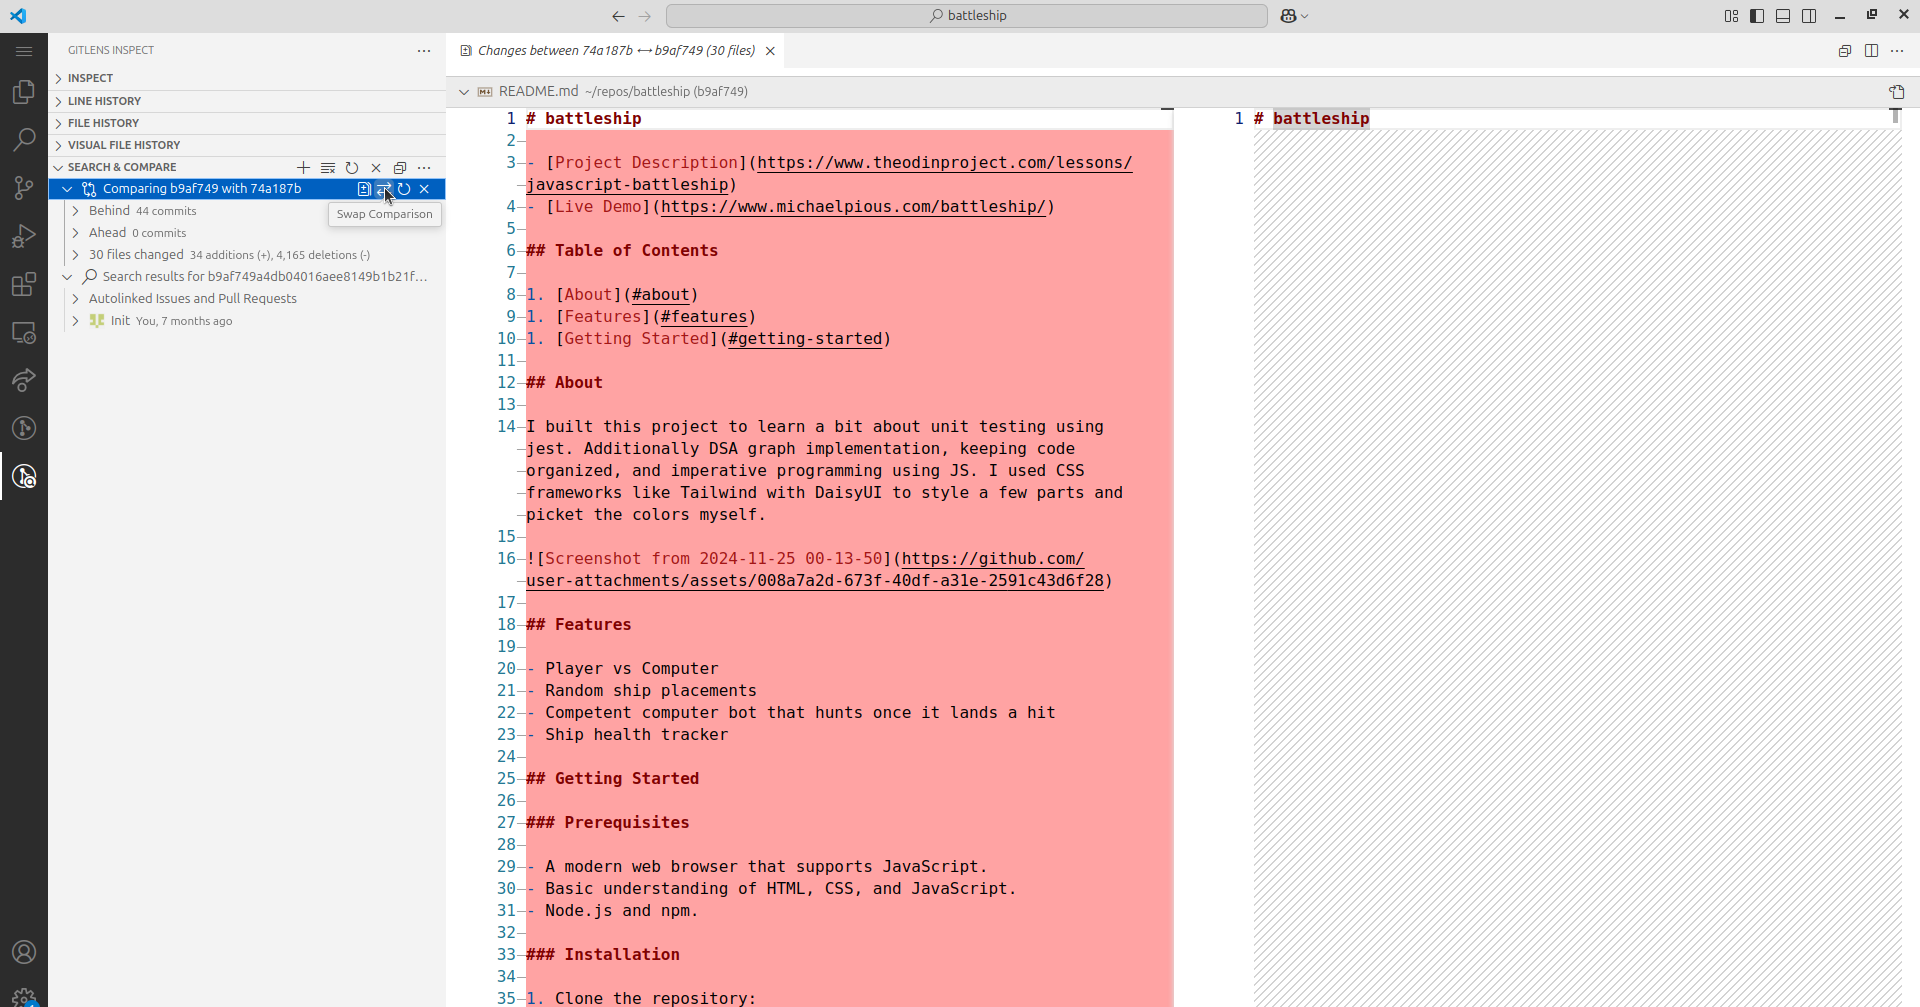
GitLens + VSCode
Open VSCode and navigate to GitLens ‘inspect’ tab.
Conclusion
GitLens simplifies troubleshooting by enabling visual commit comparisons in VSCode. For new developers, mastering GitLens builds confidence in version control workflows, a critical skill for professional growth. This process showcases problem-solving and tool proficiency, qualities valued in any development role. Thank you for reading and I hope you enjoy your development journey!